
Clipping 101

Updated:
October 3, 2022By Cassidy Nunn
Clipping is one of those jobs that many horse owners despise — it’s messy, time consuming, and too often can be stressful for both horse and owner. But you don’t have to dread clipping your horse. If you know how to use the clippers correctly and keep the horse calm and relaxed throughout the experience, you can end up with a horse that looks like he’s been to the groomers, rather than just having survived a fight with a lawnmower.
Why Clip?
When the leaves start to fall and the first cold breezes hint that winter is on the way, it’s time to decide whether to clip your horse. Clipping is beneficial to the horse that will be worked throughout the winter because it allows body heat to escape, which prevents the horse from becoming too sweaty. If not properly cooled down after a ride, the horse can become chilled as the sweat cools and the long coat remains damp. A heavy winter coat can take a couple of hours to properly dry, and a horse that becomes chilled may be more prone to colic, colds, and other serious health conditions. The horse owner who plans to ride year round should consider how much work the horse will be doing, and the conditions he will live and work in. Will the horse be hacked lightly outdoors once or twice a week, or will he be schooled six days a week in an indoor arena?
Factors such as appropriate blanketing and shelter should also be considered as well as the horse’s age. For example, an older horse may have more difficulty battling the elements and may need a blanket even if not clipped.
As an added bonus, clipping your horse can significantly cut down on time spent grooming. “A clipped coat is easier to maintain and keep clean. A quick brush gets rid of the dust after a clip,” says Jessica Strachan, owner of J. Skye Equine Clipping, in Kitchener, Ontario, adding, “A clipped horse looks sharp. All the musculature and lines are clean and easily visible.”
Clipping can have health benefits as well. Keeping the legs and fetlocks clipped can help prevent conditions such as scratches and mud fever since the mud will have no hair to cling onto. And horses with certain health conditions, such as Cushing’s disease, may be unable to shed out their winter coat in the spring, a problem which clipping can remedy.

When to Clip
Karen Brain, an experienced horsewoman and coach, and an accomplished clipper, advises that typically, the first clip of the season is done in late September or early October because the horse’s coat starts to prepare for winter in mid to late August. “If the horse’s coat grows quickly, you may need to do a second clip, sometimes even a third, but the last clip of the year should be no later than the end of February as it begins to interfere with the incoming summer coat,” says Brain.
Related: How to Tidy-Up Clip - Face, Bridle Path, Legs
Tools of the Trade
Once the decision to clip has been made, it’s important to be prepared. A clipping kit should include:
Large body clippers
- Smaller clippers (for trimming around the fetlocks, face, and hard to reach spots)
- Sharp blades (a couple of sets of each if possible)
- Cool lube
- Blade wash
- Blade oil
- Extension cord
- Toothbrush
- Scissors
- Towel
- Chalk/felt pen
- String/binder twine
- Treats
- Stepping stool
- Chain/twitch
Clippers are an investment, so research the different brands and types of clippers on the market before purchasing. “Some [clippers] are not suitable for full body clipping,” says Strachan. “Some get too hot, some are too heavy, etc. Talk to people, get opinions, and shop around.”
Dana Boyd-Miller, a representative for the clipper manufacturing company Andis, recommends going with one of the lightweight body clippers that have appeared on the market in recent years. Boyd-Miller has been making a living clipping horses full-time for over 20 years from her home base of Loxahatchee, Florida, and after 10 years of clipping four to five horses a day with heavy body clippers, began to suffer from tendonitis. She stresses that lighter body clippers can make all the difference for the person doing the clipping.

Stop every 10 to 15 minutes while clipping to clean and lubricate the clipper blades, and check to see that they’re not getting too hot. Photo: Christina Handley Photography
When clipping, only work with blades that are sharp – dull blades can chop the coat up, making it look rough and untidy – and Strachan recommends “having at least two blades so when one gets hot you can switch it out and let it cool. I switch blades about every 10 to 15 minutes during a clip.”
Strachan also carries an old toothbrush in her clipping kit and uses it to brush the hair out of the teeth of the blades. She recommends having scissors on hand for horses who object to having the clippers near sensitive areas, such as around the ears.
“I also like to keep chalk and or a felt [pen] in my kit to draw the lines of the clip on the horse,” says Lindsey Brooks, who runs her own clipping business, Brooks Clipping, on Vancouver Island, BC. To ensure an even clip on both sides of the horse, “Take a piece of binder twine and lay it over the back or neck or whatever part you are clipping and draw a line on it, then use the same string to measure the other side.”
What Not To Wear
Unless your goal is to look like a human hairball at the end of the session, never ever wear fleece or luon fabric when clipping. Brain suggests wearing a plastic jumpsuit with elastic cuffs to prevent the hair from sneaking under the clothes, and removing any lip balm or mascara because, “Hair sticks to everything!” A bandana or headband is essential for keeping the horse hair from adding an extra layer to one’s own head. For those who wear corrective eyewear, Strachan recommends,
“Glasses, not contacts, as the hair sometimes gets into your eyes and contacts make it ten times worse.” Brooks wears steel toed boots when working with particularly difficult horses, and adds that it’s never a bad idea to wear a helmet as well. Afterwards, Strachan washes her clipping clothes separately since, “The hair will wedge into anything else in the wash and make it prickle.”
Before Clipping
Always make sure that the horse is clean and well-groomed before clipping, as mud and ingrained dirt in the coat can potentially clog the clipper blades, dulling them more quickly. Excess dirt is also hard on the clipper motor. To help the clippers slide through the hair more easily, spray on a silicone product such as ShowSheen® before you begin.
Having a second person on hand can be useful. A helper can keep the horse calm and under control, pass items to the person clipping, and support the horse’s extended leg when fetlocks and lower legs are being clipped.
Choose your clipping location carefully. A safe, quiet place to clip is preferable and will help keep the horse from becoming distracted or agitated. “The best light to clip in is natural daylight,” adds Brain. She advises finding a place in the barn that is well-lit, noting that sometimes additional lighting may be needed.
Introducing the Clippers
A full body clip can take anywhere from one-and-a-half to four hours, depending on the mood of the horse and the experience of the person clipping. The process should be made as enjoyable as possible for the horse; sometimes it may take several shorter clipping sessions for the horse to become comfortable with the clippers.
Related: Horse Care Through The Seasons
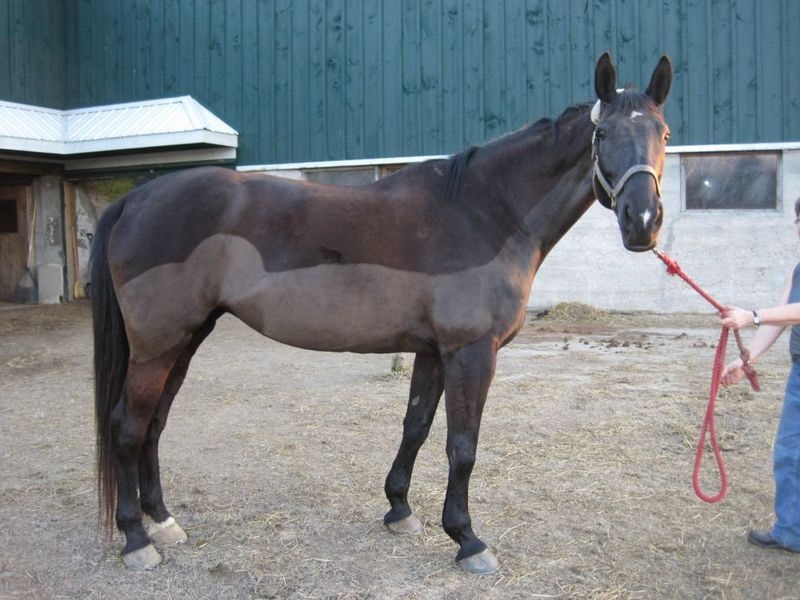
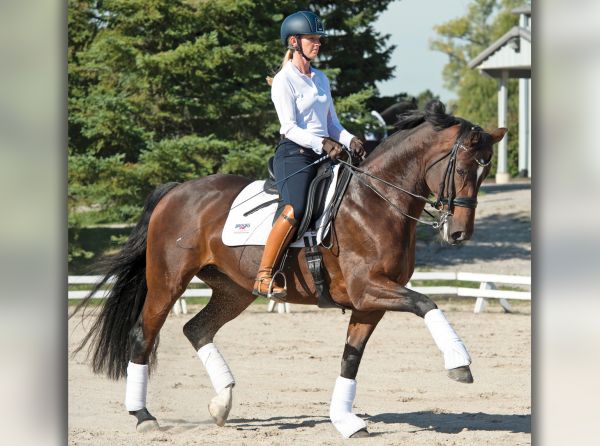
Clipping can be messy and time-consuming, but with patience and proper preparation, your horse can come out the other side looking sharp and polished, like this fellow with his lovely medium trace clip. Photo: Jessica Strachan
Strachan stresses the importance of not getting angry or frustrated with the horse. “This process can take a few hours and the only way to get through it is with lots of patience,” she says.
For a horse that’s never been clipped before, or one who is sensitive to clippers, it’s a good idea to begin by simply turning the body clippers on and off a few times while setting up the rest of the clipping supplies. This gives the horse a chance to become accustomed to the sound of the clippers so he won’t be startled when they are brought closer and pressed against his skin.
“Stand well to the side of the horse so that he can see you and not feel threatened – let him feel like he can move away from you if he feels threatened, or turn to look,” says Brain. “I then walk slowly towards the horse with the clippers running and gauge his reaction. I may have to stop and back up if the horse begins to show signs of wanting to run away, or just wait a moment for the handler to reorganize the horse again.”
Next, run the clippers (when they’re turned off) over the horse’s body so the horse has a chance to feel them. Then, practice the same motion with the clippers turned on so the horse can experience the vibrations of the blades. Brooks also suggests allowing the horse to smell the clippers so he has a chance to better assess the machine.
If the horse is particularly high strung or nervous about clippers, for the safety of both the horse and the person doing the clipping, tranquilizing the horse is an acceptable way to help him accept the clippers. However, Boyd-Miller is adamant that a veterinarian administer the tranquilizer. “I always let my vets do the tranquilizing,” she says. This way, if something should go wrong, there is a medical professional present.
Clipping Technique
Always move the clippers against the direction of the hair growth. Long, generous strokes with the clippers will result in fewer lines showing up. Otherwise, the horse may end up looking like a patchwork quilt.
“If you’re working on an area that is sensitive, switch to a slower speed, use your empty hand near the area you’re clipping,” Boyd-Miller suggests. “Your empty hand acts as a shock absorber and takes out some of the sensitivity.”
Remember to check the blades every ten minutes or so to see if they’ve heated up too much. Never use hot blades on a horse; if they’re too hot to touch, they’re too hot for the horse’s skin. “I find laying them on a cement barn floor helps cool them very fast,” says Strachan.
Shoulder: A good place to begin clipping is on the horse’s shoulder at the base of the neck as it’s the safest place to be if the horse reacts violently, kicking with his hind legs or lashing out with his teeth. “You can easily see the horse’s ears, eyes, and body from this position so you can read his expression and react accordingly,” says Strachan.

Neck: “Depending on the horse’s response, I work forward, up the neck,” says Boyd-Miller. Ask the horse to move the front leg closest to you a half step back, to open up the area where the neck attaches to the shoulder. “This will also make working on the chest easier, by keeping the skin a little stretched out,” Boyd-Miller explains.
Take care when clipping around the base of the mane. “Invert the clippers in your hand,” advises Brain, “holding them facing downward in order to clip against the direction of the hair growth. This is when you want the horse to stand still so you don’t accidentally take tufts out of the mane. Carefully pull the longer coat hairs away from the mane hairs and slip the clipper blades in between, clipping in a direct downward motion. Do the topline of the mane the same way on both sides of the horse.”
Related: Using Clippers for the Perfect Tail
At this point in the clip, Boyd-Miller recommends stopping to clean and oil the clipper blades, a practice that should be repeated every 15 minutes or so throughout the clip. “When you stop to take care of your equipment, you are also standing up straight and can take a minute to stretch,” she says. “This may be the most important tip to helping keep YOU calm and comfortable.”

Chest: To clip the chest, hold the clippers downward and follow the direction of the hair growth along the pectoral muscles. Using a hand to pull the skin flat where the hair swirls up and outwards will help keep the direction of hair growth more visible and easier to follow. Clipping the chest involves standing within range of the horse’s front legs, should he choose to strike out, so be careful and remain aware of his body language and mood.
Barrel: Once the shoulder and neck have been clipped, Boyd-Miller moves on to the belly and the barrel of the horse. The horse’s back and sides are relatively straightforward to clip, but wrinkly armpits require special attention.

Armpits: To clip the armpits, have your helper hold the horse’s front leg out in a stretch so the skin behind the armpit area becomes smooth. “It’s easier to work on a tighter surface, and you are less likely to nick the skin than if it were loose,” Boyd-Miller says.

Hindquarters: Moving on to the hip and hindquarters, step the horse’s hind foot back half a step to open up the stifle and allow the clippers better access to the cowlick swirl of hair in the area attaching the barrel to the hip. Finish the tail by clipping two diagonal lines from the sides of the tail to create an inverted “V.”

Legs: “I start working from the top of the leg down toward the hoof,” says Boyd-Miller. “Most of the leg work is clipped on a diagonal instead of straight up, through the hair, because of the rounded surface and structure of their legs.” With their delicate tendons, the horse’s lower leg can be a stressful area to clip. Hold the leg up and bent back, as if to pick out the horse’s feet, which softens the tendons. “The tendons become relaxed when the leg is up so the hard grooves disappear,” says Strachan. “It's also easier to get in behind the fetlock with his ankle limp.”

Head and Face: When it comes to clipping the horse’s head and face, smaller clippers make the job much easier since they are more maneuverable and comfortable to hold than heavy body clippers. Smaller clippers are also quieter, which helps when clipping around the ears of sensitive horses. Boyd-Miller suggests starting under the horse’s jaw and working back towards the throat, pulling the skin flat to clip the throatlatch. Then, move on to the cheek, using the cheekbone as a stopping point. “If you are going to remove the hair from the front of the face, use the lower clipper speed. I find it to be less ticklish to the sinus cavity,” says Boyd-Miller. “Gently close the eye lid while working through the eye socket. This will help fill the void above the eye and keep the loose hair out of the eye.” The whiskers on the muzzle can be trimmed to give the horse’s face a tidy appearance.

Photo: Christina Handley Photography
Ears: Boyd-Miller recommends standing on a bale of hay or step stool to lessen the gap between the person clipping and the horse’s ears because the horse will view this as a less aggressive posture. She also suggests holding the ear with your hand so that your thumb is at the base of the ear, protecting it. “The most common response is for the horse to throw his head up to get away from us. When they do this and you don’t have your thumb there, the teeth of the blades bang into the bottom of the ear.”
Many owners prefer to leave the hair on the inside of the ears and just clip the outer part. In this case, Strachan suggests that you “fold the ear closed lengthwise and clip down to get the tufts that stick out and the edges. To get the outside, hold the tip of the ear in two fingers and gently pull it down towards you and clip back.”
After Clipping
After clipping, brush any loose hair off the horse’s body with a towel or soft brush. Brain also suggests washing the horse “with hot water and either soap or an astringent to remove the oil and grease from the clipper oil and blade wash. Horses can get rashes or hives from the oils left on their skin.” Wait until the horse is properly dry before putting him away.
To prolong the life of the clippers and blades, never put them away dirty. Clean any leftover hair from the body of the clippers and the blades, and rinse the blades in blade wash.
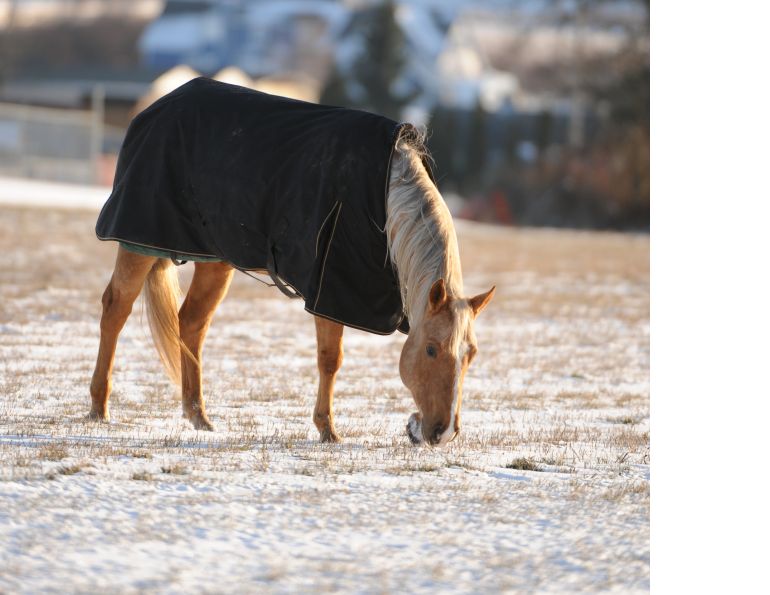
Always ensure that the clipped horse is suitably blanketed depending on the type of clip, type of stabling and turnout, and the horse’s age and metabolic rate. It’s very important to watch the horse’s weight once he’s been clipped and adjust his feed throughout the winter months to accommodate for any weight loss. A quarter sheet can help the clipped horse stay warm while being groomed and tacked up, and during warm-up and cool-down in a schooling session, or when out for a trail ride or light hack. Brain also recommends ensuring “sufficient bedding is used to prevent rubbing of the fetlocks, knees, elbows, or hocks.”
Keep these factors in mind and you’ll be rewarded with a happy, healthy clipped horse.
Related: The Great Canadian Equine Cover-Up
Main article photo: Christina Handley Photography. All other photos by Jess Hallas-Kilcoyne, unless otherwise specified.

Blogs & Podcasts
Advertisement

Related Articles


Advertisement

Featured Stories


Advertisement